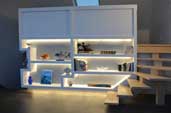
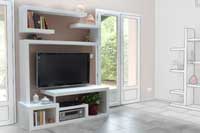
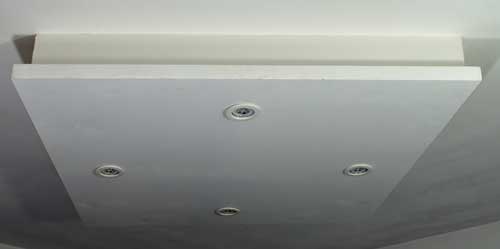
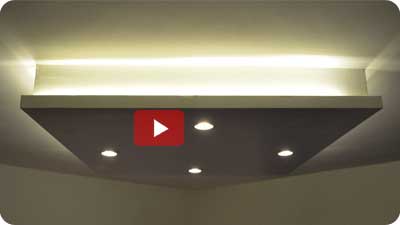
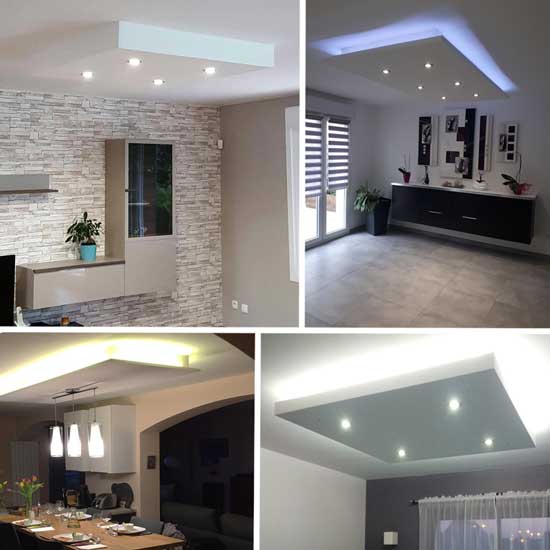
Comfortable, contemporary and economical lighting.
Whether new or renovated, a lighting box, combined with the latest LED technologies, will allow you to light your home pleasantly and create appropriate lighting atmospheres while reducing your electricity bill.
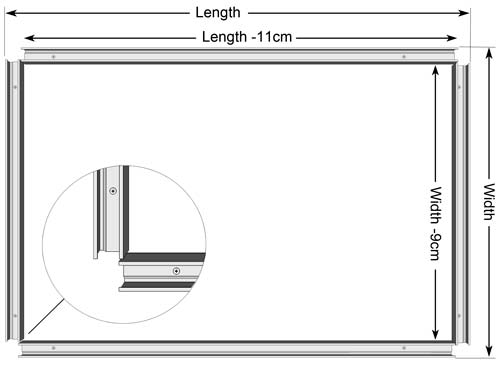
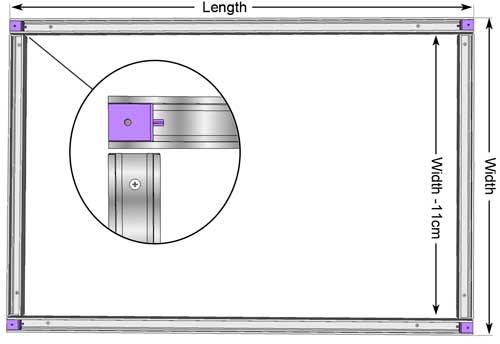
The construction of the box can be done according to two different assembly methods depending on the thickness of the box you
want to obtain:
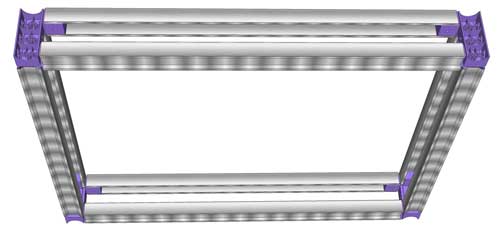
Option 1: FIXED THICKNESS
The thickness of the box is set by the length of the long Kinook block (115mm)
The studs dimensions are slightly shorter than those of the dropped ceiling in order to clear the corners and allow the Kinook blocks to inserted into the studs.
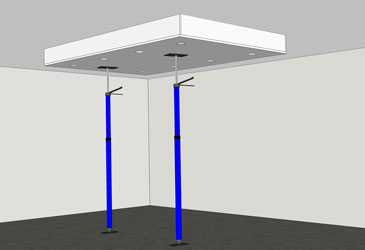
Mark the position of the studs on the ceiling (or the wall) and fix them into place.
STEP 2
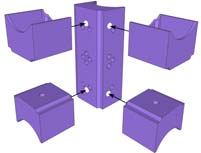
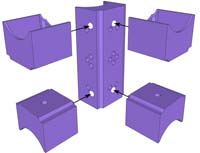
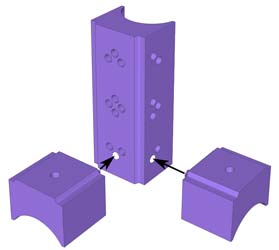
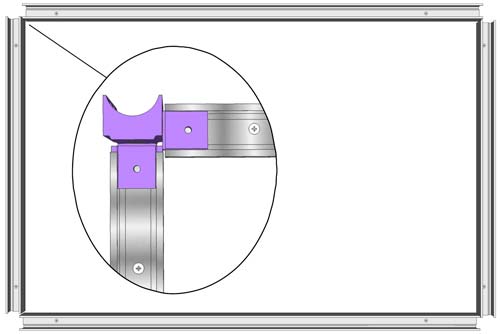
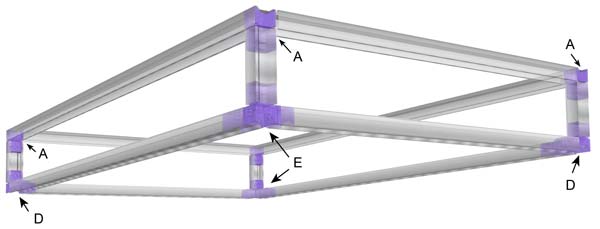
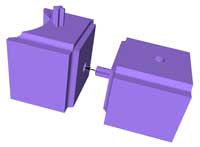
At each corner, Insert a small Kinook block at the studs ends and assemble them with a long Kinook block.
STEP 3
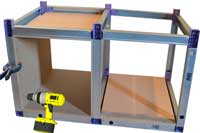
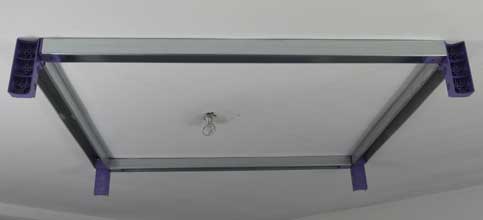
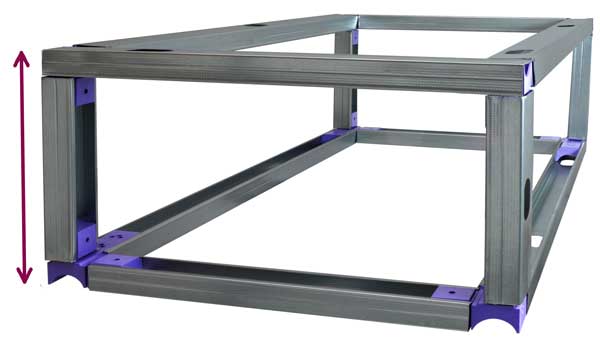
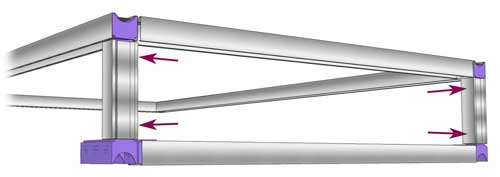
Assemble the metallic frame using the C-studs you have cut on step 1.
STEP 4
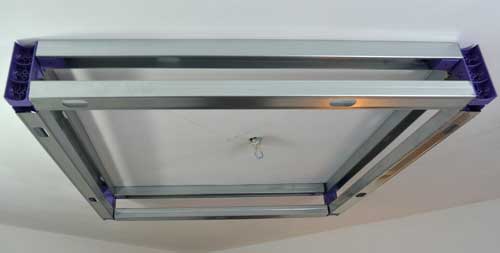
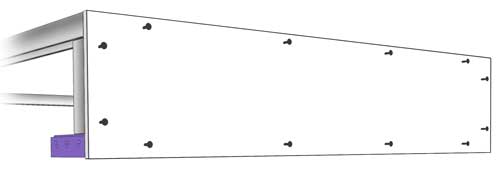
Screw on the lateral panels (Plasterboard or other material).
Note: plaster (or acrylic joint) can be added to the panel edges that will be mounted to the ceiling. This will ensure a better hold of the box to the ceiling. For a smooth finish, scrape off the excess plaster once the construction is
fixed.
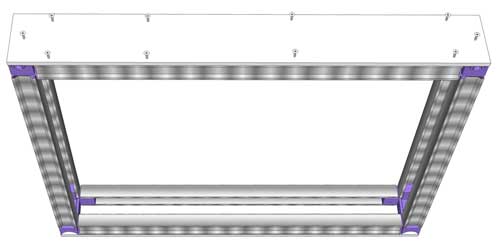
STEP 5
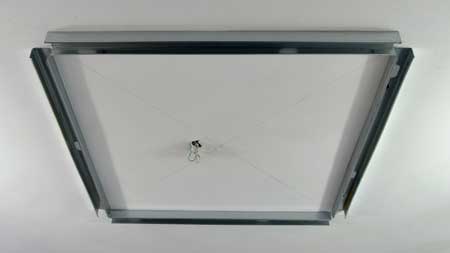
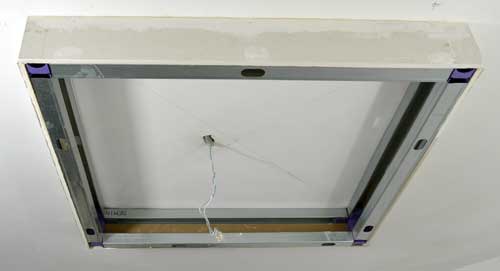
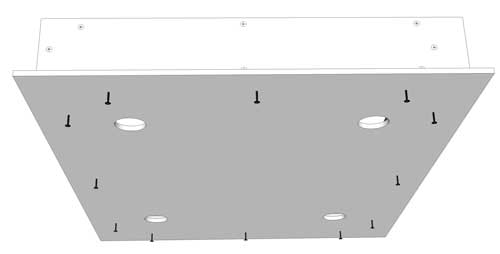
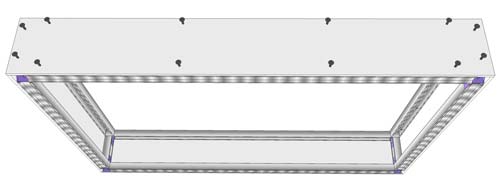
Close up the dropped box by screwing on the horizontal panel (medium or other material).
Note: Prepare the electrical part before fixing the panel.
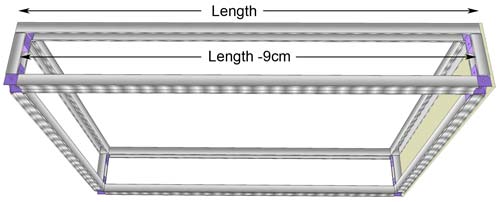
Option 2: ADJUSTABLE THICKNESS
The thickness of the box is set by the length of the vertical studs
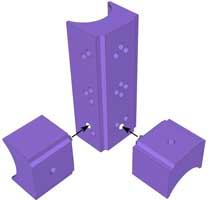
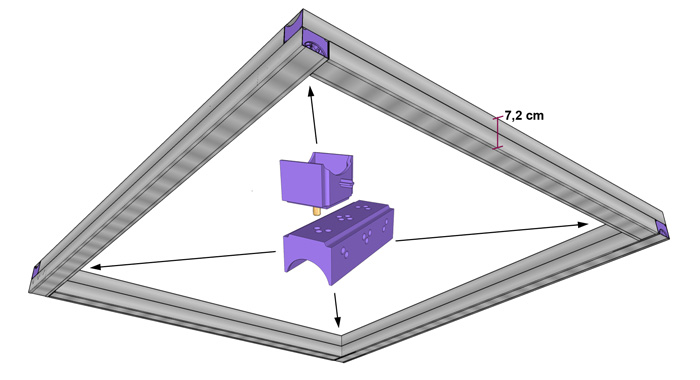
- Insert small Kinook blocks at each angle (as per figure above).
Mark the position of the studs on the ceiling (or the wall) and fix them into place.
STEP 2
Assemble the metallic frame starting with the narrowest side. It may prove difficult to get the metallic frame to hold together without the facing panels. A few tips to address this issue:
Tighten the ends of the vertical metal studs before inserting them over the Kinook blocks.
Fit a screw into each end of the vertical metal studs, then remove it to create a metallic chip that will stop the Kinook block from sliding.
Screw the metal studs into the Kinook blocks (on a side that will not be mounted with facing panels).
STEP 3
Fix the first lateral facing panel .This panel will serve as the base, holding the metallic frame together.
STEP 4
- Cut 2 studs: dropped ceiling length minus 9 cm. - Assemble the rest of the metallic frame.
STEP 5
Screw les plaques de parement (BA13 ou autres) sur les flancs du coffre.
Note: plaster (or acrylic joint) can be added to the panel edges that will be mounted to the ceiling. This will ensure a better hold of the box to the ceiling. For a smooth finish, scrape off the excess plaster once the construction is
fixed.
STEP 6
As for step 5 of the fixed thickness, close up the dropped box by screwing on the horizontal panel.
THIN DROPPED CEILING
to build a thinner dropped ceiling, one trick is to assemble two studs (C-stud or lining channel ) "back-to-back".
Example of a dropped ceiling build with a C-stud and a lining-channel
The two studs are assembled by inserting Kinook blocks in each of the studs.
The Kinook bloks are connected together with a 6 mm wooden dowel.
lining channel (17 mm) or C-studs (36 mm) can be used depending on the desired thickness.
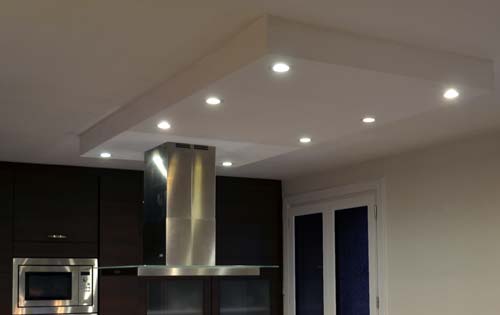
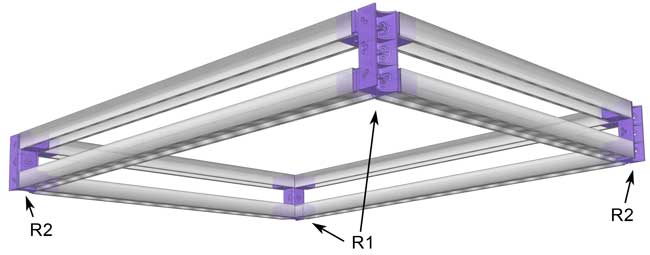
LARGE BOX
Build large size dropped ceilings
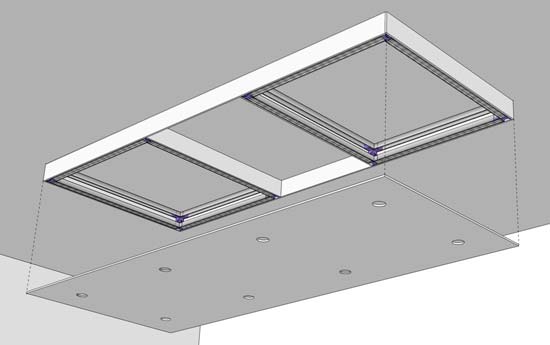
For dropped ceiling with dimensions of approximately 160 to 250cm long and ~80cm wide, add one (or more) horizontal studs to reinforce the metal structure.
For larger dimensions, use several small boxes as explained below.
Note: a small and a large Kinook block can also be used to create these type of junction.
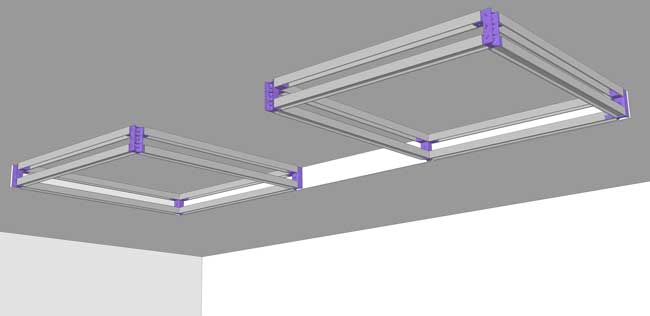
For larger dropped ceiling, the construction can be done with several small boxes spaced ~20 to 40cm apart.
maximum recommended dimensions (width or length) for each small box: ~160 cm.
Cover the overall structure with panels. To strengthen the overall structure fixe panels on each side of each boxe.
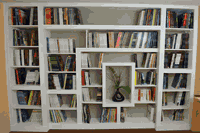
ORIGINAL SHAPES
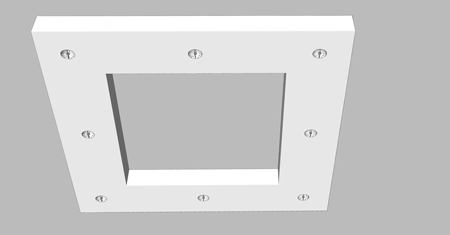
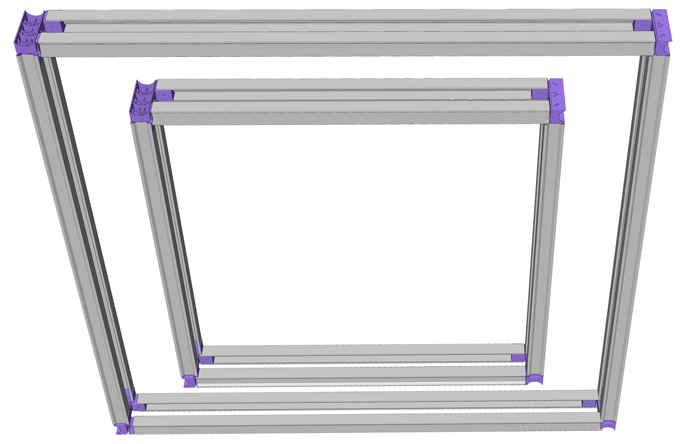
HOLLOW SQUARE
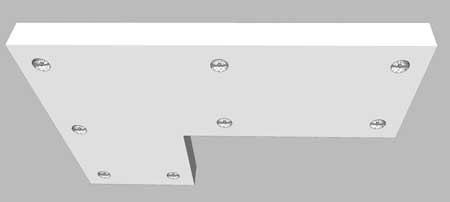
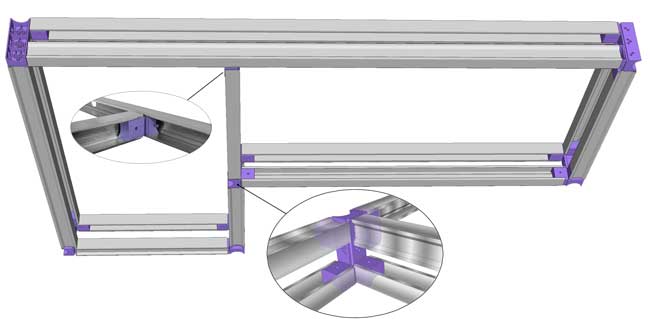
L SHAPE
Hollow Square
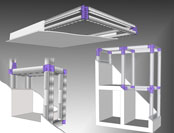
With the help of two Dropped Ceiling Box Kits, build the metallic structure as represented on above picture. Cover with panels.
L Shape
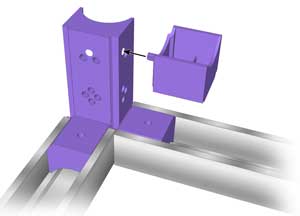
With the help of two Dropped Ceiling Box Kits, build the metallic structure as represented on above picture. An additional metallic stud has been
installed to provide a support for the horizontal panels. This stud is connected to the structure with 2 small Kinook blocks as shown on details above. note: for larger boxes, additional studs can be installed to provide more support to the
panels.
TIPS
Telescopic support can be used to properly position and support the horizontal panel.
A small access hatch can also be installed. Preferably position on a side non-visible.
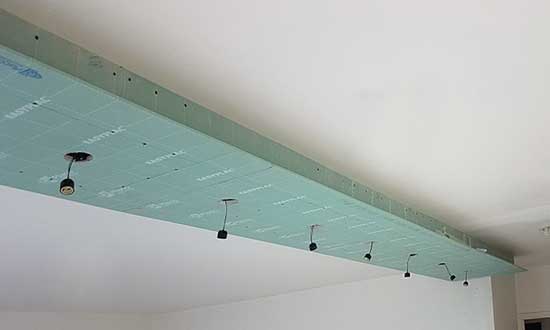
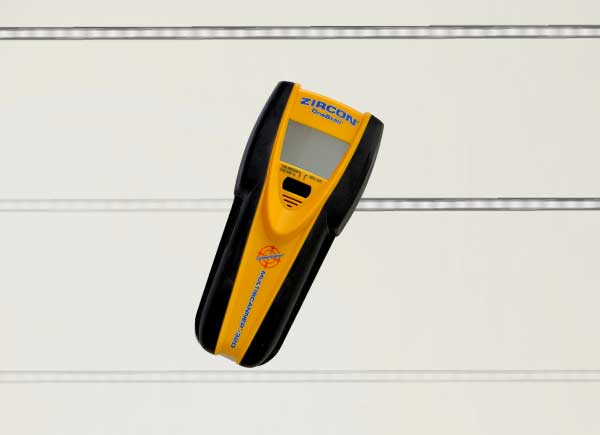
For plasterboard ceiling use a detector to locate studs (or beams) inside the ceiling
. Screw the dropped ceiling studs preferably on these studs/beams.
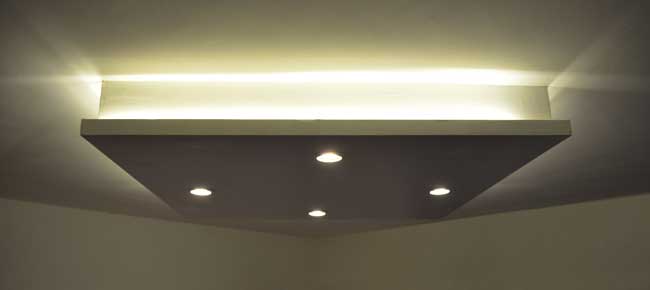
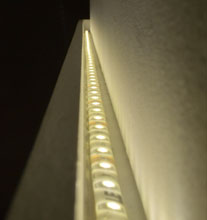
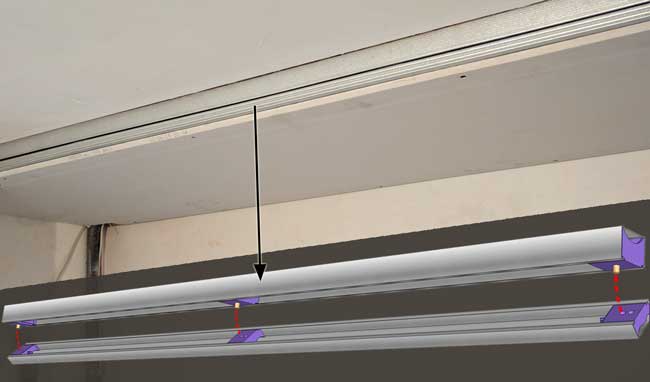
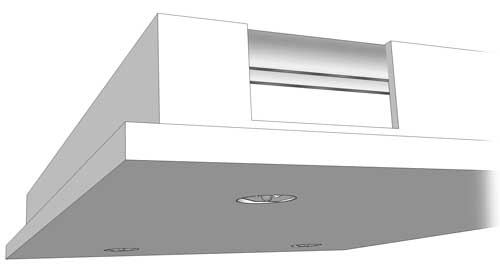
ADD LIGHTING
If you want to
add indirect lighting , to your dropped ceiling box
, stick out by a few centimeters the horizontal plate and install LED strips along the edge of the excess horizontal panel.
To conceal the LEDS, you can glue and nail a thin slat of wood along the edges of the box.
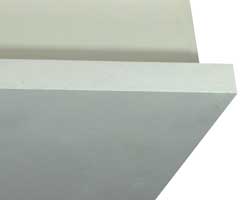
Material
For the box lateral panels, plasterboard is well suited. It can be glued with plaster or sealant which reinforces the fixing of the box on the ceiling.
For the large horizontal plate, a 6 or 10 mm wooden plate (medium, plywood, etc.) provides a beautiful finish, especially on the edges of the plate. It is also possible to nail a stick to the edge to hide the LEDs (see above). The thinner the
plate, the more studs will have to be installed to prevent it from bending